OneLiner and Power Flow have a dialog-box editor program that lets you create and edit dialog boxes. The editing is done in a graphical setting. You can drag and drop edit boxes, list boxes, combo boxes and other standard dialog-box objects from the toolbar onto your dialog box.
In this part of tutorial we assume that you have just completed step 9 in section 2.3.
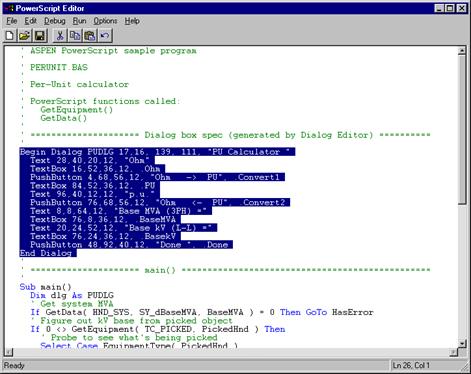
1. Select the text with dialog-box specification, which is surrounded by “Begin Dialog” and “End Dialog” keywords.
2. Select command Edit | Copy to transfer the text to Window clipboard.

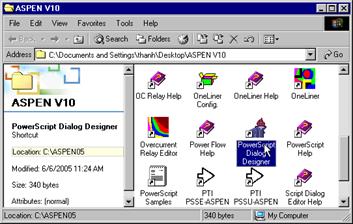
3. Open ASPEN V10 program group on the desktop.

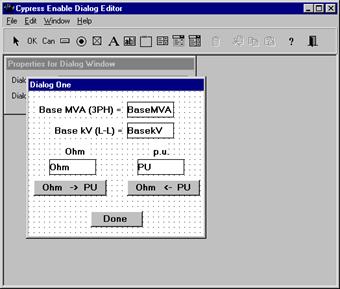
Run the dialog designer program by double clicking on its icon. The dialog editor screen will appear.
4. In the Editor, select File | Load Dialog From Clipboard. The per unit calculator program main dialog will appear.

5. Click on
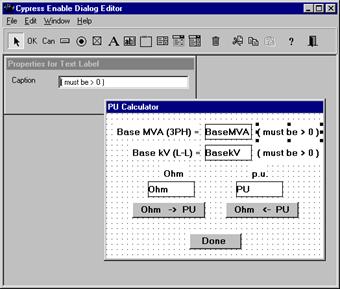
the Add Text Label button  on the Dialog Editor Tool bar. The cursor pointer will become a cross.
Click once to the right of the BaseMVA edit box.
Select Window | Properties Window command. This will bring up Properties for Text Label window.
Enter label “(must be > 0)”
Go back to the Design window. Adjust size and position of various dialog box components to tidy up the dialog box.
Repeat the process above to create another identical label next to BaseKV edit box.

6. When you are satisfied with the new appearance of the dialog box design Select command File | Put Dialog on Clipboard. The dialog editor data will be copied to the Windows clipboard.
7. Switch back to the Script Editor window without closing the dialog editor.
Note: Never attempt to close the Dialog editor by selecting File | Close command or by clicking on the Dialog editor window close button.
Select Edit | Paste to replace the old dialog data in the script program with the newly modified one.
8. Select File | Save to save the new code.
9. Run the script to check the new code.
10. Switch to the Dialog Editor to make any changes to the dialog and repeat step 5-8.
11. Select Edit | Dialog Editor to close the dialog editor.