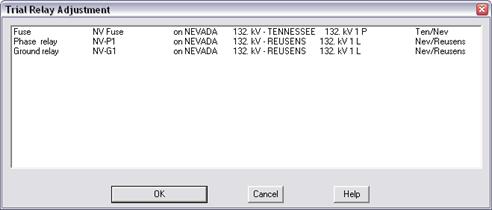
The Edit | Trial Relay Adjustment command in the OC Curves Window lets you examine, for a given relay current, how the relay operating time varies with changes in time-dial and pickup settings.
Starting with version 12, this command lets you examine how the fuse operating time varies with different fuse sizes. In addition you can use this command to see the variation in curve shape even when there is no fault current available.
OneLiner redraws the relay or fuse curve continuously as you vary the relay parameters and fuse size. The changes are made final only when you press the “Apply It” button.
TO MAKE TRIAL RELAY AND FUSE ADJUSTMENTS WITH FAULT CURRENT:
The following assumes that you have (1) simulated a fault using the Fault | Specify command in the Main Window and (2) displayed a specific fault with the Show | Relay Operations for 1 Fault command in the OC Curves Window.
1. Select the Edit | Trial Relay Adjustment command.
A dialog box will appear asking you to select a relay or fuse curve.

Select a relay or fuse and press OK.
IF YOU SELECTED A RELAY
A second dialog box will appear allowing you to adjust the time dial and pickup setting.
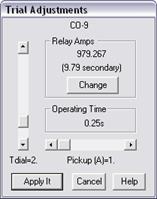
1. Press Change in the “Relay Amps” group box to use a current other than the actual fault current for trial adjustments.
Another dialog box will appear asking for the relay current.

Enter a current in 'Amps' and press OK.
The program will use the relay current you specified to compute the trial setting, and display the relay current and operating time in the dialog box titled 'Trial Adjustments'.
2. Manipulate the scroll bar to change the relay settings.
The relay current and operating time are shown. An operating time of 9999s means the current is too low to trip the relay.
Adjust the time dial setting with the vertical scroll bar.
Adjust the pickup setting with the horizontal scroll bar.
The relay curve and the operating time are updated continuously as you make these adjustments.
3. Press Apply It to transfer the new time dial and pickup settings to the relay.
IF YOU SELECTED A FUSE
A second dialog box will appear allowing you to adjust the fuse size and the minimum melt/total clear setting.
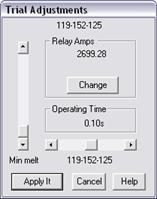
1. Press Change in the “Relay Amps” group box to use a current other than the actual fault current for trial adjustments.
Another dialog box will appear asking for the fuse current.

Enter a current in 'Amps' and press OK.
The program will use the fuse current you specified to compute the trial setting, and display the fuse current and operating time in the Trial Adjustment dialog box.
2. Manipulate the vertical scroll bar to toggle between the minimum melt curve and the total clear curve.
The words “Min melt” and “Total clear” will appear at the bottom of the vertical scroll bar.
The fuse operating time is updated automatically as you make this adjustment.
3. Manipulate the horizontal scroll bar to change the fuse size.
The updated curve name will appear underneath the horizontal scroll, and the curve will be redrawn.
The fuse operating time and the fuse curve are updated as you make this adjustment.
4. Press Apply It to transfer the new curve type and the minimum melt/total clear setting to the fuse object.
TO MAKE TRIAL RELAY AND FUSE ADJUSTMENTS WITHOUT FAULT CURRENT:
The following assumes that the curves in the OC Curves Window are being displayed without any fault currents or fault description.
1. Select the Edit | Trial Relay Adjustment command.
A dialog box will appear asking you to select a relay or fuse curve.
Select a relay or fuse and press OK.
IF YOU SELECTED A RELAY
A second dialog box will appear allowing you to adjust the time dial and pickup setting.
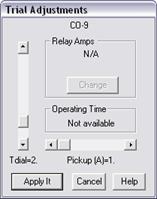
1. Manipulate the scroll bar to change the relay settings.
Adjust the time dial setting with the vertical scroll bar.
Adjust the pickup setting with the horizontal scroll bar.
The relay curve is updated continuously as you make these adjustments.
2. Press Apply It to transfer the new time dial and pickup settings to the relay.
IF YOU SELECTED A FUSE
A second dialog box will appear allowing you to adjust the fuse size.
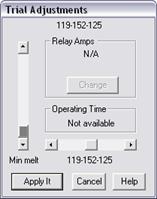
1. Manipulate the vertical scroll bar to toggle between the minimum melt curve and the total clear curve.
The words “Min melt” or “Total clear” will appear at the bottom of the vertical scroll bar.
2. Manipulate the horizontal scroll bar to change the fuse size.
OneLiner redraws the curve as you make changes.
3. Press Apply It to transfer the new curve type and the minimum melt/total clear setting to the fuse object.
Curves Window
EDIT MENU