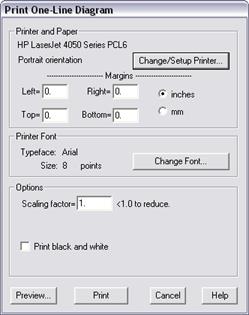
The Print One-Line Diagram command in the Main Window lets you print the one-line diagram using the current printer. (You may change the current printer using the Print Setup command described on the previous page.) The printed image is not limited to the portion of the one-line diagram that is visible on the screen. You can control the size of the graphical symbols and the extent of the printed one-line diagram by varying a “scaling factor”.
TO PRINT THE ONE-LINE DIAGRAM:
1. Select the File | Print One-Line command.
A dialog box will appear asking you for the scaling factor. The name of the printer will be shown at the top of the dialog box.

2. Enter the desired margin on all sides of the printed page.
3. Enter a scaling factor to enlarge or reduce the image.
The scaling factor allows you to adjust the size of the image on the printed page. When the scaling factor is 1.0, the program will map the portion of the one-line diagram visible on the screen to the printed page. When the scaling factor is less than 1.0, the magnification will be reduced allowing a larger portion of the one-line diagram to be copied onto the printed page.
We suggest that you experiment with different values of the scaling factor to find the one that works best for your printer and paper size.
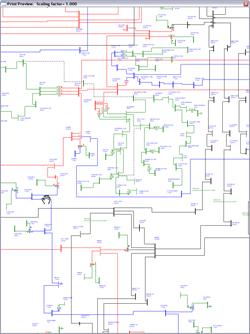
4. Click on the Preview button to see how the one-line diagram will appear on the printed page.
A pop-up window will appear to show you the portion of the one-line diagram that will be printed. This window has the same aspect ratio as the printed page. The bus names and other text in the Preview window are drawn with a screen font that emulates the printer font’s typeface and size. Within the preview window, the arrow pointer associated with mouse will change to a small hand.

You can change the contents of the printed page by dragging the hand icon with the mouse.
Close the Preview Window by double clicking on the control menu box at the upper left corner.
5. Click on the "Change Font" button to select the printer font.
A dialog box will appear asking you to specify the font.
The fonts shown in the list box are those available on your printer. The program uses Arial to paint on the screen. You may wish to select another typeface if Arial is not available on your printer or you prefer the appearance of another font.
Font size controls the height of the type in units of points where one point is defined to be 1/72 of an inch (0.35 mm). The font size is not affected by the scaling factor. Text printed using a 10-point font will be 10/72 inch high no matter what the value of the scaling factor happens to be. For this reason, you should specify a small font size to go with a small scaling factor.
Use the controls in the standard font selection dialog box to select the typeface and font size you want. Click on the OK to close the font dialog box.
Optional: Press the Preview button to see how the new font looks on the one-line diagram.
6. Mark the check box labeled ‘Print black and white’ if you want to print the one-line diagram in black and white on a color-capable printer.
7. Press Print to close the dialog box and to commence printing.
Main Window
FILE MENU