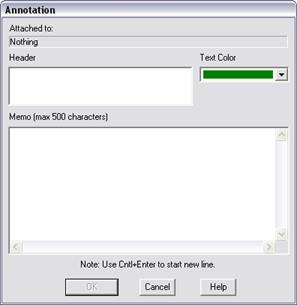
The New | Annotation command in the Main Window lets you add an annotation anywhere in the one-line diagram. You can use the annotations to label the substations or to highlight certain features and modifications that warrant special attention. You can also use the annotations as temporary labels for printing and delete them immediately afterwards. The user interface for the annotations is the same as that for the network elements: You can move an annotation with the mouse; you can highlight it by clicking on it with the mouse button and you can change it by double-clicking. The annotations will be saved within the .OLR file; therefore, they stay on the one-line diagram once you have created them. To execute this command you must first select the location where you would like the annotation to appear.
You can attach one or more annotations to any object on the one-line diagram. When you move the object, the program will automatically move the attached annotations.
TO ADD A NEW ANNOTATION:
1. Select the annotation location.
Click the left mouse button once on the desired location of the new annotation.
2. Select the Network | New | Annotation command.
A dialog box will appear to let you enter the new annotation.

3. Enter the annotation in the Header box.
The header can have up to 50 characters. This part of the annotation will appear on the one-line diagram.
4. Choose a color from the drop down combo box.
The annotation will be drawn with this color.
5. Enter additional text in the memo field.
The memo box allows you to type in additional comments of up to 500 characters, but the memo text will not be shown on the one line diagram. This is designed to reduce clutter on the one-line diagram. The ellipses symbol (…) after the annotation indicates the presence of the associated memo.
6. Click OK to close the annotation dialog box.
The annotation will appear at the location you selected with the mouse.
TO ATTACH AN ANNOTATION TO AN OBJECT:
1. Attach the annotation to an object.
To attach the annotation to an object first left click on the annotation and then shift-right click on the object to be attached to.
A floating menu will appear.
Click on the "Attach annotation to Object" menu item to attach the annotation.
A "*" at the beginning of the note indicates that it is attached to an object. You can attach more than one annotation to an object.
TO DETACH AN ANNOTATION FROM AN OBJECT:
1. Detach an annotation from an object.
If an annotation is already attached to an object it can be detached as follows:
First right clicking to bring up the floating menu and choosing the "Detach from Object" command.
Main Window
NETWORK MENU