
The relay setting interchange logic (RDBI) library contains data mapping tables / scripts that are designed to translate relay settings in external file or database to OneLiner and vice versa. These data mapping tables/scripts are invoked by the program when executing: 1) OneLiner relay import wizard; 2) OneLiner Retrieve setting command; 3) ASPEN Relay Database import OneLiner setting command.
You can use the RDBI Library Editor tool to edit existing data mapping tables/scripts in the library and add new ones to the library to import settings for relay types that the program does not support out-of-the-box. The RDBI library editor is also used to edit and add setting request query rules in ASPEN RDB, which OneLiner executes when retrieving settings for RDB linked relays.
The rest of this section will explains in details how to use the RDBI Library editor tool to modify or create data mapping tables / scripts and RDB setting request query rules in the ASPEN Relay Database.
TO OPEN RDBI LIBRARY IN THE EDITOR:
1. Open ASPEN OneLiner program folder in Windows Explorer and open the executable file RLYLIBMAP5.EXE
The default path of ASPEN OneLiner program folder is c:\program files\aspen\1lpfv14 (or on Windows 64-bit c:\program files x86\aspen\1lpfv14)
The Database login dialog box will appear

2. Enter full pathname of the RDBI.RSX file you want to edit or the ASPEN RDB name or the UDL file
RDBI library file RDBI.RSX is located in the program folder by default. You can also place a copy of RDBI.RSX in OneLiner library directory to be able to modify it without requiring the Windows admin privileges. When copies of RDBI.RSX are found in both folders, the OneLiner will uses the one with newer date/time stamp.
For ASPEN RDB linked relays, the program can also utilizes RDBI data mapping tables/scripts stored in the database. RDB-stored data mapping tables/scripts are automatically shared by all OneLiner installations that accesses the RDB.
NOTE: To open RDBI.RSX, use the following login credential
User name: dev2
Password: developer
The Relay Setting Import Logic Library Editor main window will appear
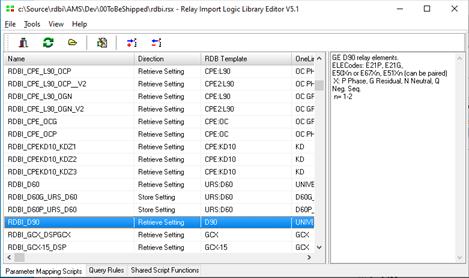
TO VIEW CONTENT OF AN EXISTING DATA MAPPING TABLE/SCRIPT:
1.
Highlight the script in the list and click on the View selected script toolbar
button  .
.
The Data Mapping Table/Script Editor will appear with source code of the selected table/script. The Editor will be in read-only mode because you cannot make changes directly to the script inside the library.
TO EXPORT ALL TABLE/SCRIPTS TO DISK FILES
1. Select File | Export all scripts to disk.
The Select Directory dialog box will appear to let you select the disk folder where you want to save script files with extension .AMS. You can make desired changes to table/script files and import them back to the library.
TO IMPORT TABLE/SCRIPT FROM DISK FILE
1. Select File | Import Script File.
The File Open dialog box will appear to let you select the script file (extension .AMS) to import.
NOTE: if there is already a script in the library with the same name as the script file being imported, it will be overwritten with the new content.
TO REBUILD THE LIBRARY
1. Select Tools | Rebuild library.
The Select Directory dialog box will appear to let you select the disk folder with script files (extension .ams) that you wish to include in the library.
The Rebuild command is designed to perform the following:
- Remove all existing data mapping tables/scripts in the library.
- Import all script files (extension .ams) found in the folder you selected
- Update the library build version and date stamp.
TO DEVELOP ASPEN RELAY DATABASE SETTING REQUEST QUERY RULE
1. Click on the Setting Request Selection Rules tab.
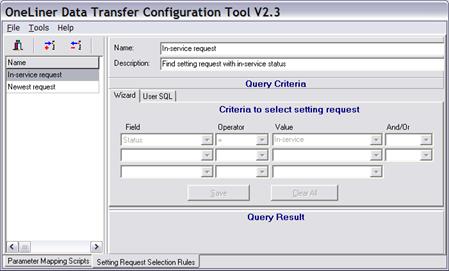
ADD A NEW RULE
-
Click on the toolbar button  .
.
- Enter Name, Description
- Use the Wizard or Enter ASPEN Relay Database SQL command to specify desired selection criteria
- Click Save when done.
REMOVE AN EXISTING RULE
-
Highlight the query you want to delete in the list and click on the toolbar
button  .
.
TO EDIT TABLE/SCRIPT FILE ON DISK
1.
Select File | Open Script File or press the Open script file toolbar button
The File Open dialog box will appear to let you select the script file (extension .AMS) you wish to open.
The Mapping Table Editor or Script Editor will appear with source code of the script you selected.
Refer to section G6 for details on using the Data Mapping Table or Script Editor
TO CREATE A NEW MAPPING TABLE
1.
Click on the New Script toolbar button . The New Parameter Mapping Script wizard will
appear
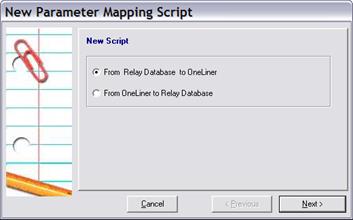
Select a radio button that corresponds to the desired data mapping direction. Press Next.
The wizard dialog page with list of relay setting templates in RDBI.RSX or ASPEN RDB will appear
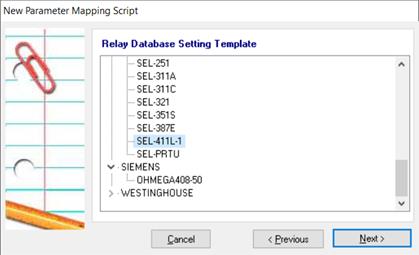
Select in the relay template you wish to use for the new data mapping table/script.
Press Next.
The wizard dialog page with list of OneLiner relay types will appear:
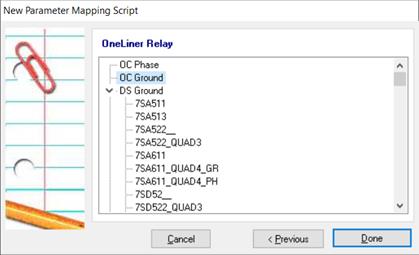
Select the OneLiner relay type you wish to use in the new script.
Press Done.
A new empty data mapping table for the selected relay types will appear in the Data Mapping Table Editor.
Refer to section G6 for details on using the Data Mapping Table Editor
Note: If you do not find in this dialog box the OneLiner relay type that you want to use, cancel the wizard and log out. Execute the OneLiner command Relay | ASPEN Relay DB | Initialize Database Template command on the relay database or the RDBI.RSX file to update it with the latest relay types in OneLiner library. Repeat the Create New Data Mapping Table steps above.
TO EDIT MAPPING TABLE/SCRIPT ON DISK
Select
File | Open Script File or press the Open script file toolbar button 
The File Open dialog box will appear to let you select the script file (extension .AMS) you wish to open.
The Mapping Table Editor or Script Editor will appear to let you edit the selected file.
Refer to section G6 for details on using the Data Mapping Table Editor and the Data Mapping Script Editor