A coordinating pair consists of two relay groups: a "Primary" group and a "Backup" group. The coordination pair information is used by the legacy coordination checking command Check | Primary/Backup Relay Coordination Command. The Form Coordination Pair command in the Main Window allows you to add coordinating pairs. Once you have added a coordinating pair, the updated information is recorded in the binary data file.
Note: There is coordination checking command that does not require coordination pairs. See the Check | Relay Coordination using Stepped Events command for more information.
There are two methods for forming relay coordination pairs. One of the methods described below also allows you to remove coordinating pairs.
TO ADD A COORDINATION PAIR:
This is the first of two methods to form a coordinating pair. This method requires you to select two relay groups with the mouse prior to executing the command.
1. Select the primary relay group and the backup relay group.
Click the left mouse button once on the primary relay group. Then, with the <Shift> key held down, click the left mouse button once on the backup relay group.
The relay-group symbols will turn dotted red when selected.
2. Select the Relay | Form Coordination Pair command.
A dialog box will appear informing that the coordinating pair has been form.
TO ADD OR REMOVE COORDINATION PAIRS:
This is the second of two methods to create a coordinating pair. This method requires you to select only one relay group prior to executing the command. You can also use this method to remove existing coordinating pairs.
1a. Select a relay group.
If you want to create a new coordinating pair, you can select either the primary relay group or the backup relay group.
Click the left mouse button once on a relay group.
The relay group symbol will turn dotted red when selected.
1b. Select the Relay | Form Coordination Pair command.
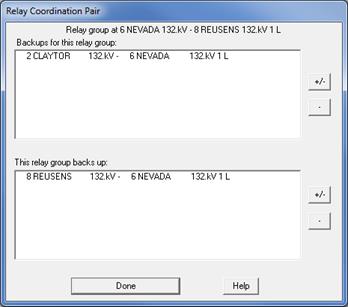
A dialog box with two list boxes will appear. The top list boxes contain the backups of the selected relay group. The bottom list box contains the relay groups for which the selected relay is a backup.
In the following example, the relay group at the NEVADA end of the NEVADA-to-REUSENS 33kV line already has a backup, and it is, at the same time, a backup to another relay group.

3. Manage coordinating pairs in which the selected relay group is the primary.
Press the ‘+/-’ button to the right of the top list box.
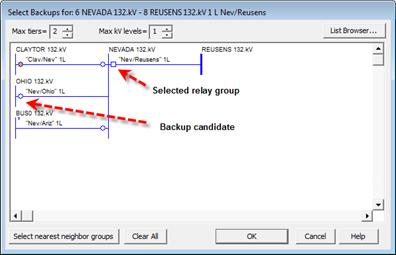
A graphical window will appear showing the selected relay group and neighboring relay groups in a tree form. You can resize this window by dragging its edges or corners with the mouse. In the example below, the Max tiers parameter is set to 2 and the Max kV levels is set to 1 to show the candidate backups two breaker/relay group back and on the same kV level as the selected relay group[. Note that the existing backup relay group at the CLAYTOR-NEVADA is shown in red, indicating that it is already a backup.

Select or de-select one or more backup relay groups by clicking the mouse button on the relay group symbols. The selected relay groups will toggle between red (selected) and hollow (not selected).
Optional: Press the Selected nearest neighbor groups to instruct the program to find the backup relay groups for you automatically.
Optional: Press Clear All to de-select all the backup relay groups.
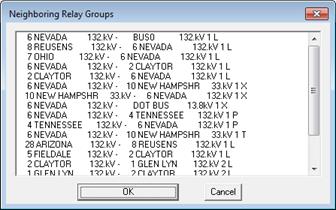
Optional: Press List Browser to open the alternative list-box based browser to make relay group selection.

Press OK when finish.
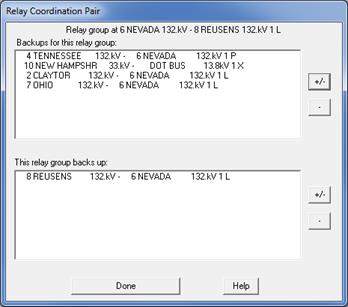
The latest list of backup relay groups will appear in the Relay Coordination Pair dialog box, like this.

Remove any unwanted backups by clicking on the entry in the list box and press the ‘-‘ button.
4. Select relay groups that are backed up by this relay.
The procedure is similar to that of step 3.
5. Press Done when finish specifying the primary/backup pairs.
Main Window
RELAY MENU