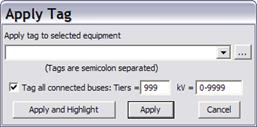
The Apply Tag command in the Main Window lets you assign tags to network elements and to protective devices. Tags give you a power tool to manipulate groups of network elements and protective devices that are related for some purpose. Once you assign a tag to a number of objects, you can manipulate them as a group with a single push of a button within the Tag Browser (Network | Tag Browser command):
•Delete them.
•Take them in or out of service.
Tags can also be used to:
•Identify line pairs that share a circuit breaker at a bus. (See Faults | Line Fault Summary command.)
•Give a special color to certain network elements. (See Diagram | Color | Special Color Code command.)
TO ASSIGN A TAG TO A PIECE OF EQUIPMENT:
1a: For protective equipment and for load units, shunt units and generating units, first open the info dialog box.
Then click on the tags hyperlink at the bottom of the dialog box, which looks something like this:

Press on the blue tag names or the word “None”. Skip to step 2.
1b. For other objects, you can either use the method of 1a, or the following alternative method: Select the object by clicking, with the right mouse button, on its symbol in the one-line diagram.
The equipment symbol will become dotted red.
Select the Network | Apply Tag command.
2. A dialog box will appear.

3. Enter the tags that you wish to assign.
Type the tag names in the edit box. Separate adjacent tags with semicolons.
Alternatively, press the button labeled ‘…’.
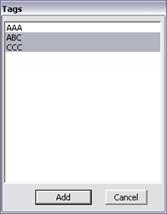
The Tags dialog box will appear to show you all the tags in the file, in alphabetical order.

Select the tags you want by highlighting them with the mouse.
Press the Add button.
The tags you selected will be added to the edit box of the Apply Tag dialog box.
4. In the Apply Tag dialog box, mark the check box Tag all connected buses and enter the number of tiers and kV range to apply the same tags to those buses.
5. Press Apply to apply the tags to the object you selected in step 1a and 1b, plus the connected buses if you have marked the Tag all connected buses check box in step 4.
Main Window
NETWORK MENU