ASPEN Relay Database (RDB) linkage is possible only if you have installed the ASPEN Relay Database client program or the Database Working Model on the same computer as OneLiner.
Note: OneLiner version 10.10 and earlier used a different RDB linkage engine. If you had saved in an ORL file RDB links using those versions, OneLiner will continue to employ the old engine interface in this version. Please refer to the respective version of on-line help and user manual for details. You will need to remove all the old links in the OLR file before you can start to use the new linkage engine described in this section.
TO ADD A NEW LINK TO A RELAY IN THE ASPEN RELAY DATABASE
1. Click on “+” button next to the box labeled Linked Relays.
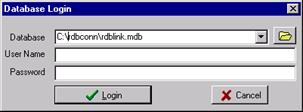
If you have not yet logged in to the RDB, a login dialog box will appear.

Enter database name, your user name and password and click on Login to log into the Relay Database. Please refer to the Relay Database user manual for more information on Relay Database login procedure.
A dialog will appear with a list of substations and relays in the RDB.
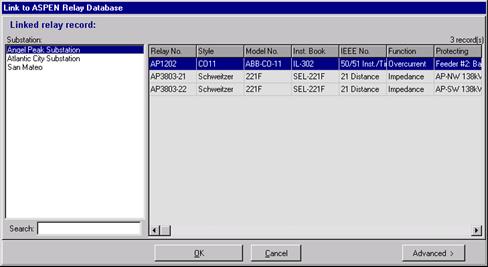
Select a substation and a relay for which you want to establish a linkage.
Press OK to go back to the relay properties dialog box.
Note: It is possible to link a OneLiner relay to multiple RDB relays.
2. (Optional) Click on “Advanced” button.
The advanced link properties dialog box will appear:
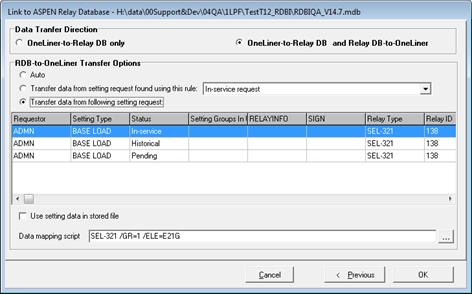
Specify transfer direction: You can enable data transfer in one direction or both.
Option for selecting setting request in RDB for setting data transfer:
- Auto: Transfer data from the latest setting request that was stored in the linked RDB relay from OneLiner.
- Use rule: The ‘rule’ is in the form of an SQL query. The program will execute the query to find the setting request for the data transfer. You can create customized rules using the Relay Import Logic Library Editor program included in ASPEN OneLiner and ASPEN Relay Database software packages.
- Request in list: The list contains all setting requests that belong to currently selected RDB relay. The program will ask you to select a setting request for the data transfer.
Click the “…” button next to RDB-to-OneLiner Data mapping script edit box to select a program from the list of available scripts stored in the RDB.
Enter required mapping script parameters
The program will invoke this script program with all specified parameters to calculate OneLiner relay parameters from physical relay settings stored in the RDB setting request when you retrieve relay settings from RDB to OneLiner. You can use the Relay Import Logic Library Editor program to develop mapping scripts for setting templates in your relay database. Check APPENDIX G: EXTERNAL RELAY SETTING DATA for more details.
Click OK to go back to the relay properties dialog box.
TO MODIFY A LINK
Select the link you want to modify and click on “…” button next to the box labeled Linked Relays.
TO REMOVE A LINK
Select the link you want to remove and click on “-” button next to the box labeled Linked Relays.
TO RETRIEVE SETTING FROM ASPEN RELAY DATABASE
. Click on “Retrieve Settings…” button next to the box labeled Linked Relays. A dialog box will appear to show differences in relay parameters in OneLiner and relay database.
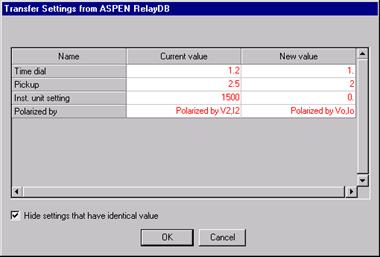
Click OK to accept new OneLiner setting data from RDB.
TO STORE ONELINER SETTING TO THE ASPEN RELAY DATABASE
Click on “Store Settings…” button next to the box labeled Linked Relays. A dialog box will appear to let you enter additional RDB setting request data fields:
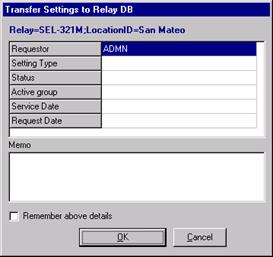
Press OK to store OneLiner data to the Relay Database. A new Relay Database setting request will be created with OneLiner relay parameters.
See APPENDIX G: EXTERNAL RELAY SETTING DATA for a more detailed discussion on the linkage to the ASPEN Relay Database.